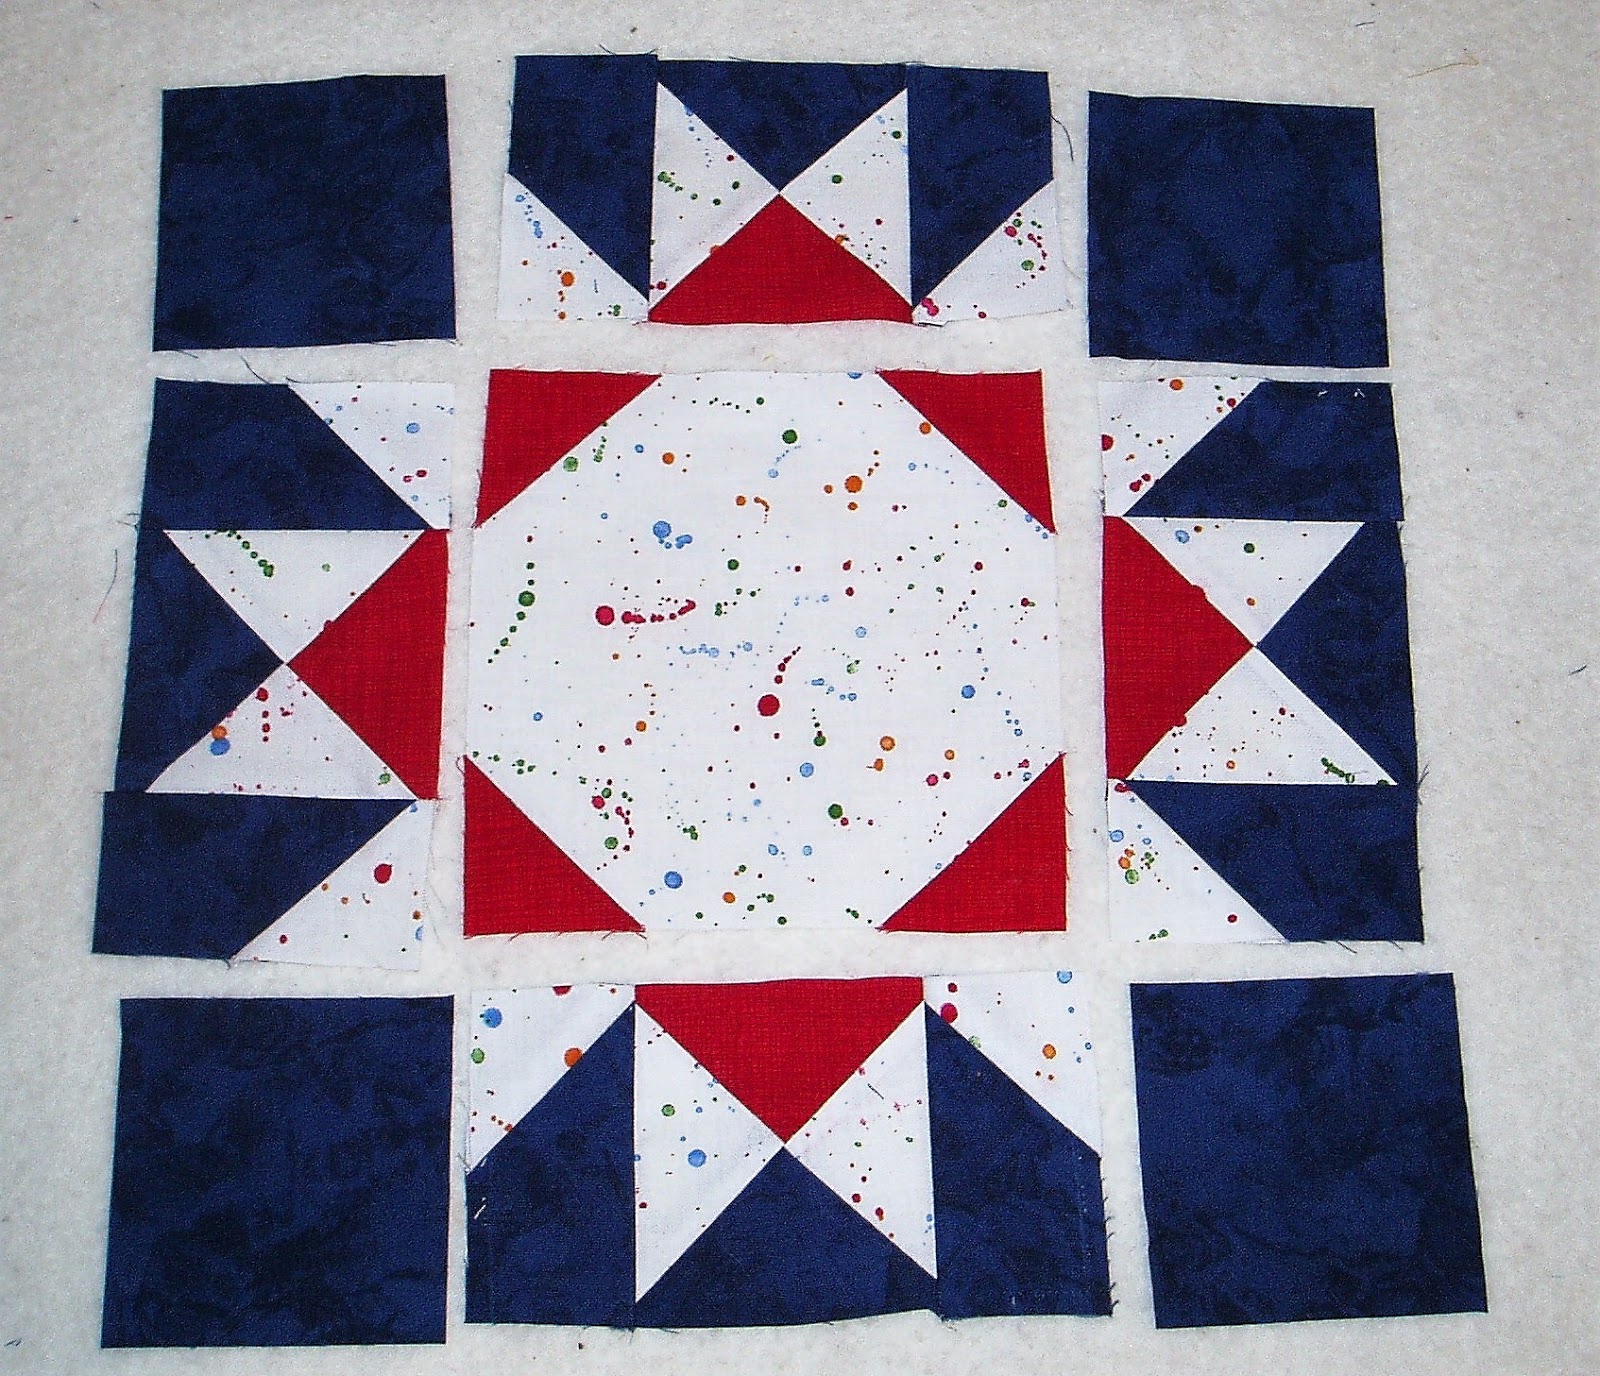
Here is this month's block:

Isn't that lovely? I didn't realize it would be so patriotic-looking. In my head I've been calling this the "supernova" block, but it's real name is Rising Sun, which appeared in the Dakota Farmer in 1926, and appeared in other variations as far back as 1895. This block looks complicated but it has nice sized pieces and easy units, and it goes together quickly. I had to adapt it a little bit to fit modern methods, but it looks substantially the same as the historical block.
For my block, I used a white print for the neutral, along with some red to bring the warm colors down to this end of the quilt. The center is quite large and would be great for a fussy cut piece if that's something you do. Orange or yellow would also look good as an accent if you don't want to use red.
Let's get to it!
Cutting:

(pieces marked with a * can be oversized if that's something you do)
From the white, cut:
1 6-1/2 inch square
2 4-1/4 inch squares*
8 2 inch squares (see instructions before cutting for an alternate method)
From the red, cut:
1 4-1/4 inch square*
4 2 inch squares
From the background, cut:
1 4-1/4 inch square*
4 3-1/2 inch squares
8 2 by 3-1.2 inch rectangles (see instructions before cutting for an alternate method)
To complete the quilt section:
Cut from the background:
1 2-1/2 by 12-1/2 inch strip
1 2-1/2 by 14-1/2 inch strip
Construction:
There are only three easy units to make for this block. Let's start with the center square. First, take the 4 red 2-inch squares and draw a line on the back of each square from corner to corner. Arrange the squares on the corners of the 6-1/2 inch white square as shown:

Stitch on the line on the back of the red squares to "snowball" the corners of the white square. Trim 1/4 inch from the stitching and press the red square up.

This unit should measure 6-1/2 inches square.
Next we are making some quarter triangle squares. Take all of the 4-1/4 inch squares and cut them all (in all colors) from corner to corner twice to make 4 triangles:

Arrange the triangles as shown, with white on the left and red and blue on the right:

Stitch the center seams. You should have 4 pairs of each color. Press to the red and blue triangles.
Arrange the pairs as shown and stitch, matching the center seam:

Press in either direction. Each quarter triangle square should measure 3-1/2 inches square. Trim if necessary. Make 4.

The final unit is a unit I call flags. The flag units are made by stitching a square to one end of a rectangle, forming a triangle at the end of the rectangle. They're very easy, but if you are nervous about making them, I suggest cutting all of the pieces 1/4 inch larger, then trimming down at the end. (An alternate method for these units is below.)
Take the 8 white 2-inch squares and draw a line on from corner to corner on the back of each one. Arrange the squares on the triangles as shown, with the lines facing in opposite directions. You should have 4 squares with the line to the left and 4 with the line to the right:
 |
| I drew on this photo to enhance the lines. My stitching is not really that messy! |
Stitch right on that line, then trim 1/4 inch from the seam and flip the triangle up, making a flag unit. Make 4 in each direction. These flags should measure 2 inches by 3-1/2 inches.

Alternate method for flag units:
Use a 4-3/4 inch square of both the white and the blue to make 8 2-inch half-square triangles. Arrange the hsts in the correct direction, then add a 2 inch blue square to the bottom of each hst. These should measure 2 inches by 3-1/2 inches.
That's the end of the units! Let's put this block together!
Assembly:
First, make the side pieces. Take the quarter triangle squares and the flag units and arrange them as shown, paying special attention to the direction of the flag units.

Stitch and press in either direction. Make 4 side pieces.
That's it! For the final assembly, lay out the units as shown, making sure that the red accent pieces form the circle in the center of the block:
Join the units into rows and the rows into a finished block. Give it a good press, stand back, and admire!
Your block should measure 12-1/2 inches square and look spectacular. Take a small break, have a cool drink, and let's finish another part of this quilt.
To complete this quilt section:
Add the 2-1/2 by 12-1/2 inch strip to the left side of the block. Press well, then add the 2-1/2 by 14-1/2 inch strip to the bottom of the block. Press well.

Take the quilt section that was completed last month and join it to the Rising Sun section to make a complete row. Make sure that there is a 2-1/2 inch strip at each end of the row. Row 3 is complete!

Measure your new row and the larger quilt that has already been assembled. Adjust your row at the the seam between the sections if necessary to make sure that the larger section and the row you just completed are the same.
 |
| Adjust at this seam if necessary. |
Be sure to measure, because being off by just a little bit on each of those seams can make your row too long. And who wants wrinkles stitched into their new galaxy? I had to adjust mine by about 3/8ths of an inch.
Fold row 3 in half to find the center of the row, and mark it with a pin or chalk mark. Fold each end to the center pin and mark at the folds as well. Do the same for the larger section. This seems like a waste of time, but the row is long and has no seams to match, so it's important to keep the new row from becoming stretched out while stitching or otherwise becoming askew.
Join the new row to the larger quilt, matching the centers, other pin marks, and the seams at the sides. Interior seams will not necessarily match. Don't worry about this. This is what keeps the quilt from looking "blocky." Be sure to match the seams at each end as these are a part of the first border.

Press well and do a happy dance. 75% of your quilt is complete!
Thanks for coming along on this quilt with me! Next month we start the last row, with the big finish in sight. Meet back here on September 5 for that exciting chapter!

Sharing at soscrappy and Let's Bee Social.
10 comments:
The quilt is looking wonderful, I love the modern feel and especially the dark blue background. I really like the fabric you used in this block, it just looks like someone splattered it with different coloured paints.
So pretty. I am so far behind, need to sew July's and August's blocks, lol.
What a pretty quilt. Really fun to see each block. I like the blue background!
That block is a great addition to the quilt. It's going to be gorgeous.
Festive looking block and the pieces and parts came together nicely!
That is a pretty block, Mari! I really like the "paint-spattered" look of your neutral fabric. The blocks look wonderful all together!
Lovely block. The quilt is coming together so beautifully.
This is a beautiful block!
What a fun background fabric. It really does add a nice visual contrast to the quilt.
You are right. It is so much easier than it looks. And it looks terrific.
Post a Comment