Saturday, July 28, 2018

Strawberries and tomatoes

(Anyone who is interested, there is a scrap giveaway at the end of this post!)

I have a confession to make about the color red-- I've long thought that I don't like red.  But I was wrong!  Turns out that I don't like most shades of red, but I do like the brighter, happier reds.  Think tomatoes and strawberries, not bricks and barns.  This realization has changed my entire approach to red.  And it only took more than 25 years of quilting!

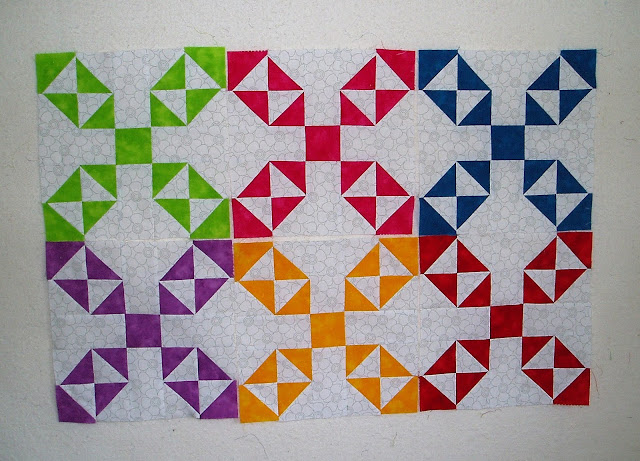
With that in mind, I finished the blocks for my various RSC projects in happier reds this month.  Some of the darker shades did sneak in, but not too many. Let's start with the hollow 9-patches, because that's the prettiest picture I managed to take:


I only managed to get five 9-patches this time, since I had pathetically little red that I wanted to use.  This puts me a little behind, but I'm sure I'll make it up on the other colors.

I also made the patchwork scrap stars in red:


This time I used a pretty turquoise for one of the stars and a novelty print of crayons for the other.  I'm trying to use scraps of 15 different prints in each star, and to accomplish that I had to add in a few darker pieces, but I think they're pretty well hidden.  And yep, those are a couple squares of Christmas fabric.  Hey, they have red backgrounds!

The final RSC project I have is the galaxy stars.  These were really hard to photograph, probably because of the contrast between the red and the blue, and also because it was pretty overcast when I took these photos, so the light balance in this picture is a little weird:


I'm looking forward to this quilt!  I decided that I'll stop making blocks when I run out of the dark blue fabrics, so I really don't have very far to go.  My only real goal is to use those up.

I feel like I'm making decent progress, all things considered.  And it's the end of the month, so it's time for the monthly giveaway of what remains in my scrap bin, except this month there is a little extra:


I decided to get rid of all the reds that I don't like, so what you see here is about two pounds of fabric, much of it in fairly large pieces.  The large piece that the others are lying on is a full half-yard, and two of the pieces on the right are almost half yards.  On the left are some smaller pieces, including the leftover pieces from the Harry Potter quilt.  And, of course, a nice handful of precut 2-inch and 1-1/2 inch squares as well.

The giveaway is now closed!   Thanks to all!

Would you like to have this fabric to make whatever you please?  Yay, because I would like it gone!  I can only send it to the US or Canada, sadly, but if you would like to have it, all you have to do is leave a comment on this post.  Really!  As you know, the Squared Away quilt is rushing to the end, so just for fun, leave a comment with what you might like to see for next year's BOM quilt.  I'm starting to think about it, and I have a lot of ideas, but I'd like to hear yours!  I'll pick a winner randomly, using the random number generator thingy, on Monday evening, July 30th.

Hope everyone is having a good weekend, and that your red scraps are under control!

Sharing at soscrappy for RSC18.

Wednesday, July 25, 2018

Triangle stars progress

Hello all!  First, a *huge* thanks to all of you who sent kind words and thoughts for my brother in law, who had his kidney transplant on Friday.  He is doing great!  If you can believe it, he went home late on Monday, because apparently getting an organ replaced is no big deal now.  The donor actually stayed in the hospital less than 24 hours, too.  But everyone is doing great, and I appreciated all your kindnesses.

And now back to the quilting!  I am working on writing some things and doing some research-related work that is taking far more time than I thought it would.  The only quilty project I've been making any progress on is the triangle stars quilt:


You can see that I decided to put the blocks on point, which I think makes them really shine.  I'm not sure that the blocks will all stay where they are now, but I put them up on the design wall to measure my progress.  And don't they look all bright and happy up there?  I did already cut the setting triangles, too, which kind of gives me a look at the whole quilt.


Since I chose an on-point quilt, I need fewer blocks, only 32 for this size, about 57 by 71 without a border.  This means I get to leave out the darkest colors from the jelly roll and I have to make many fewer half-square triangles, which is good because these triangles are pretty much taking over my life.  There are so many! I cut the triangles for four blocks at a time, because the cutting can be pretty dull, and then just feed the triangles through the machine.  It's a good thing this method means very little trimming!


I haven't decided about a border yet, but I don't think I'll have one.  Since there is a lot of the strip left after cutting the hsts and other pieces, I was thinking of using the leftovers for a binding, but I'm afraid it will be too choppy.  Also, the leftovers are about 14 inches long, so that would be a lot of piecing.  I'll have to think on that for a bit more.

So there we are!  Write a little bit, sew a little bit--eventually they will all be done, right?  It is going to rain here for the rest of the week, and be really warm, so I'll be inside doing one or the other.  The weather may be crummy, but the hot, wet summer has given us these beauties, which I am having for supper:


Ah, the taste of summer!  Hope you're having a good week!

Sharing at Let's Bee Social, Confessions of a Fabric Addict, and Finished or Not Friday.

Friday, July 20, 2018

Wild about Harry

Hi folks, and happy weekend to you all.  There are not that many weekends in a summer, so we'd best enjoy them while we can, right?

Right now I feel like I should wave a magic wand around and say some kind of incantation, because I have finished off the top for the Harry Potter quilt!  What the heck--wingardium leviosa--


It looks pretty in the sunshine!  If you recall, my daughter has very strongly requested a Harry Potter quilt, and she chose this Hogwarts Crest Quilt by Pieces by Polly.  What could I do but make it for her?


As you can see, this quilt was pretty easy.  I altered it a little so I could customize the size, but that just meant that I used all squares and none of the rectangles that are in the original pattern.  The only problem I had was that the crest in the center used fusible applique, which I really dislike.  I thought that it would make the center of the quilt really stiff and not cozy at all, so instead I used a glue stick to temporarily stick pieces down and then satin stitched around the different parts of the crest.


After I had the crest all together, I cut out the layers behind the top applique so that there would be only one layer, plus it got rid of the shadows behind the applique pieces:


After I satin stitched the crest to the pieced portion of the quilt top, I also cut out behind it so that the whole quilt is just one layer, which should make it easier to quilt and make it much cozier:


Every time I do applique this way I am reminded how much I dislike it.  If I ever make another one of these, I'd definitely adapt the pattern for hand applique or at the very least turned-edge applique that can be stitched by machine.  I just think the satin stitching looks bad and takes way too much time.  The crest took as long to make as the rest of the quilt all together.

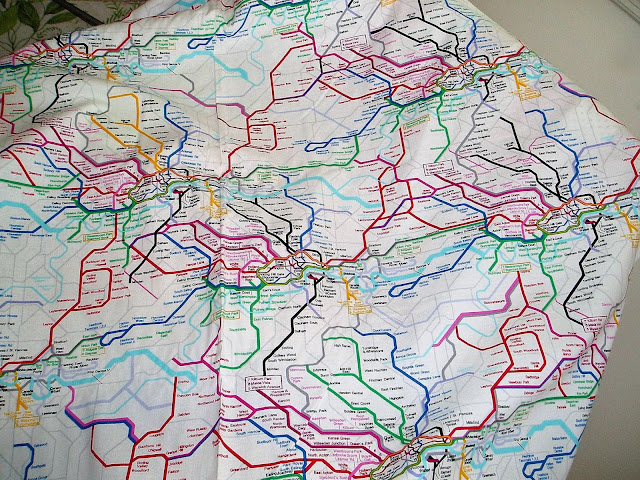
That was the only problem I had, though! And look what I have for the backing:


Yep, that's a Timeless Treasures print of the London Underground system.  Isn't that perfect for a Harry Potter quilt?

So now the top is pieced, the backing is made, and the batting is cut!  All I have to do is decide how to quilt it.  I'm thinking pinstripes would be nice.  How to do the borders, though?  That will require some thought.


Hope everyone has a great weekend.  This is a big weekend for our family.  My brother in law is getting a kidney transplant!  Hurray, hurray! He is an elementary school principal and father of two and is getting a transplant from a very generous living donor.  If you're so inclined, please keep him,my sister, their kids, and the donor and her family in your thoughts.  Thanks!

UPDATE: Surgery was a success! The kidney is working and both patients are doing well.

Sharing at Confessions of a Fabric Addict, Finished or Not Friday, and crazymomquilts.

Wednesday, July 18, 2018

Experimental results

How is your week going?  I have a nice pile of books and notes from my library time last week, *plus* all of the shutters are now painted and re-hung on the house.  They look amazing, and it makes the rest of the house look like it got a paint job.  I am so happy with how it turned out, though it was very, very warm and just a bit humid.  But now it's done and I probably don't have to do it again for several years.  The books, though, I have some serious plans for.

Some of you may remember that I started making sailboats out of leftover half square triangles a little bit ago.  I had planned to make them into a baby quilt, but then I had another idea:


Not a great picture, but yes, I want to make a word quilt with them.  I have a great sentence to put with the boats, but as you can see, I'm having some trouble with the letters.  Really, with the size of the letters.  Okay, and some of the shapes, too:


No clue what happened with that S!  I've been wanting to make a whole word quilt for a long time, and I have three really good ideas, but one thing and another has held me back.  I've done some words, so I've made a bunch of letters, but unfortunately I can't show you any of them because they're names of real people.  I have really only done capital letters, too, and now I'm thinking that I want at least some of these letters to be lower case, for design purposes if nothing else.


See how those letters are all inconsistent sizes and just look odd?  The "o" may be on steroids or something!  And what happened with the "y"?  No idea.  I think my way forward here is more practice.  I need to make some smaller pieces to get more practice with the letters and get them to be consistent sizes.  Thankfully, though, making some small pieces sounds like something I'll enjoy, and it sounds like a good use of sewing time, which I confess has been in short supply lately.  Oh, and I'll make some more sailboats, too!

So that was my failed experiment for this week, but I do also want to talk about an experiment that has really worked out well for me-- daylight light bulbs.  Friends, I had no idea what a huge difference these would make in my life.  I haven't given any thought to light bulbs in literally decades, but now I am so sorry that I waited so long to pay attention.

I took the advice of many people and also did some research and tried a bunch of different bulbs.  Some of them were very expensive and some were cheaper, but all of them were much, much better than the regular soft white bulbs I had been using.  I tried several brands, but I ended up returning most and keeping these:


I kept these mainly because they were the cheapest, to be honest.  I paid $3.82 each at the Walmart near me.  There was not that much difference in the light put out by the different bulbs, but there were huge differences in price.  Some of them were as much as $11 each! These put out a wonderful light that is a lot like natural daylight, and is bright and clean.  It's amazing how great everything looks, plus the colors look clearer and fabrics match a lot better.  And they lift my spirits, which is really the best thing!

One thing to look for is daylight bulbs, not full-spectrum bulbs.  Full-spectrum did not put out a great light, and I thought the daylight bulbs were brighter and cleaner.  Also, there are both dimmable bulbs and non-dimmable bulbs, and the non-dimmable ones are much cheaper (but obviously don't work with dimmer switches).  I used these in the sewing room and liked them so much that I got some for the garage, too. And now I want them in the kitchen!

I also got a light therapy box-- which I love-- but that's another post!  It's THIS one, which is cheap and puts out a nice light on rainy days.  I know I'm probably not using it correctly, but it feels good to have it on when it's gross outside.  I've even taken it with me to the library, which is somewhat dark, especially in the section I mostly use.

So there are the results of two experiments!   I'll be thinking up some kind of saying or phrase that I can practice making letters with while I finish up quilting the Harry Potter quilt.  If you have a good suggestion, be sure to let me know!


Sharing at Let's Bee Social.

Wednesday, July 11, 2018

The last jelly roll

Hi all!  Summer is rolling right along, isn't it?  In May I made myself a schedule of work that needs to be done before September 1, and I can't believe how fast we are creeping closer and closer to that date!  I've made progress on many things, I'm happy to say, but somehow there is always something else to do.  I wish I was progressing as fast as the days are!

As you know if you have been around here for any time at all, I really dislike most precuts and have been trying to use up the ones I have so that they will be gone and not take up any more room in my sewing room or in my head.  I'm happy to tell you that I have cut into the last jelly roll!  Hurray!

First, a nice picture of the blocks I'm making, just to have something pretty to start with:


Okay, the picture is a little artsy, but it does get boring to take pictures of blocks all the time.  Here is the jelly roll (which I know is a term that's trademarked by Moda or somebody, so I should be calling it a rollup or whatever, but really-- does anyone think of these fabric rolls as anything but jelly rolls?):


Yep, it's a bright one! It's a very colorful roll of bright strips from Robert Kaufman.  I don't know how long I've had it but it only cost $28, which tells me that it's been here way too long. It's time to move it out and use it up in something nice.


That is certainly bright and festive, isn't it? I've paired the strips with the gray on white print to make some candy-colored blocks, mainly because I had enough of the print and the strips are nearly solids, plus it's nice to do something different.  I like white backgrounds with brights, but I do that a lot and sometimes I need a (small) change. This is just different enough but doesn't make me too nervous that I've chosen badly.


This is the block that I'm making from the strips. It's a really old block pattern, dating to before 1897. I've already used this block once this year, as a part of the Squared Away quilt project (the tutorial for the block is HERE if you're interested.)  On it's own, the block doesn't look like much, but when you put them together you get great secondary patterns:


I like how these play together and really, how can you turn down an easy, happy quilt like that?  I cut these blocks from the jelly roll exactly the way that I showed in the tutorial and it has worked out great.  So far I've been using them as leaders and enders for the Harry Potter quilt, which is coming along nicely. Since these are 10-inch blocks and I can make 40 of them from the strips, I should get a quilt that measures about 60 by 70.  I'm going to have to use some of the leftovers to make two extra blocks, but there are some generous scraps left after cutting so that shouldn't be a problem.

I've cut a bunch more of these, so they should keep me busy for a while, plus I have to finish up that Harry Potter quilt.  Not that my daughter is cold, but I want to get it done while I still have a little time.  It's easy, too, but a little tedious since it's all squares.  I'm hoping to have that one done next week.


I'm spending the rest of the week in the library, then doing some outdoor painting this weekend.  What an exciting life I have! At least it's air conditioned there.  Hope you are getting a lot of summer projects accomplished, too.  See you next week!

Sharing at Let's Bee Social.

Saturday, July 7, 2018

Squared Away Block 7

Hi all, and welcome to the next block for the Squared Away quilt project!  This is block 7, can you believe it?  If you have just found this quilt along or have missed a block, links to all of the blocks so far can be found on the tab at the top of this page and a tab on Angela's page at soscrappy. It's never too late to start!

Our colors for this month range from red to maroon, so grab a few festive pieces and come sew along.  Our block for this month is very easy:

Round the Corner, Nancy Page, 1920

This is Round the Corner, a Nancy Page block from 1920.  I made my blocks in just one red and a background, but Angela has some variations using more than two colors over on her page.

Let's make some blocks!

Cutting for 10-inch blocks:

I made my blocks using strip piecing, but if you have squares already cut, by all means use those! No reason to make more scraps.


From the red, cut:

1 2-1/2 by 13 inch strip
2 2-1/2 by 5-1/2 inch strips
1 4- 1/4 inch square OR 2 2-7/8 inch squares* (can oversize if you want some wiggle room)

From the background, cut:

2 2-1/2 by 13 inch strips
1 2-1/2 by 5-1/2 inch strip
1 4-1/4 inch square OR 2 2-7/8 inch squares*

Construction:

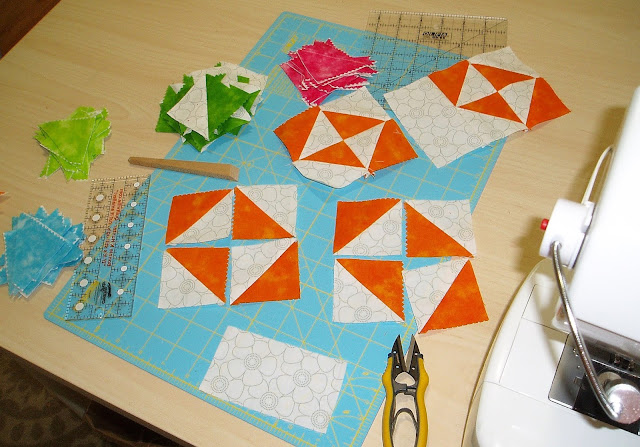
For this block, we need 4 half-square triangles.  I used a new-to-me technique to make 4 at a time.  These do end up with bias edges, but a little bit of spray sizing took care of that for me.  Also, the cut size I've given here is from a chart that I had, which is good if you sew really carefully, but you may want some room for error in case you aren't perfect. (Confession: I had to make mine twice.)  If you don't want to make them this way, cut 2 2-7/8 inch squares of both the red and the background and make the hsts using conventional methods.

To make the hsts, take the red and background 4-1/4 inch squares and place them right sides together.  Using a 1/4 inch seam, stitch all the way around the edges of the squares:


Do not leave an opening for turning!  There is no turning.

Take the stitched-together squares and cut from corner to corner twice to make 4 triangles:


Open the hsts, press, and trim to 2-1/2 inches. If you're worried about the bias edges, press them with a little Magic Sizing or the starchy stuff of your choice.


Next, take the 2-1/2 by 5-1/2 inch strips and stitch them together along the long edges, with the background strip between the two red strips.  Press to the red, then cut into 2 2-1/2 inch sections. (A little bit is included for straightening.)


Finally, take the 2-1/2 by 13 inch strips and stitch them together along the long edges, with the red between the two background strips.  Press to the red, then cut into 5 2-1/2 inch sections.


Assembly:

Assembly for this block is very simple! Gather all of the units you made and arrange them as shown, making sure that the red triangles face in to the block:


Join the units into rows and the rows into a finished block.  Press to the red triangles and to the sections with red on the top and bottom.  Give it a good press, stand back, and admire!


What a great-looking, quick block! If you pressed everything to the red, all of the seams should nest well and your block should measure 10-1/2 inches square. 

For this month, I stuck with simple two-color blocks, which I think look spectacular:


And that is our seventh block!  We are 3/4s of the way to a finished quilt top! As always, hop on over to Angela's to see some more blocks and some of her variations.  If you are so inclined, remember that Angela has a linkup at her blog every Saturday, and we would all love to see your blocks.  You can also link up Instagram posts there, and be sure to tag me (@academicquilter) and/or use #squaredawayquilt so I won't miss seeing your pretty blocks.

Our next block will be posted here on August 4th, so be sure to come on back for that.  Bring scraps!

Sharing at soscrappy for RSC18.

Friday, July 6, 2018

Cooler with a side of thrifty

Has the heat broken where you are yet? Supposedly it has broken here, and it's not close to 100 degrees any more, but it's still 90.  Do you think it will cool off if we all solemnly swear not to complain this winter?  As I do every year, I am giving thanks for Willis Carrier, the inventor of air conditioning.  It's the only way I survived this past week.  Where would we be without it?

Since it was a week filled with all kinds of other fun, there was not a lot of sewing time in there.  Still, it was really hot, so a few hours in the sewing room and I ended up with this:


Yes, it's another runner.  Hey, they're fast, and I got to practice some more quilting.  I had a specific purpose in mind for this one, too.  I needed a runner to protect the top of the sideboard, which is where I make tea in the morning and where I sometimes keep the fruit bowl (when it's not so hot that the fruit rots).  It gets a lot of action and I don't want it to be scratched.  Plus, the sewing room is air conditioned, so. . .


I can hear some of you now--"that's a lovely runner, Mari, but it does not look like your style at all."  You are correct!  I did not make these blocks.  They are one more set of blocks that I got in scrap bag.  They're beautifully pieced and worked great as a part of this runner, even if the colors aren't really what I usually use. 


When I got these blocks, I also got a yard and a half of the background fabric, which has a light aqua floral pattern in it. The selvage says that it's Luna Notte by Moda, which is several years old and is probably unfindable at this point.  The extra yardage meant that I could use it for the borders and a narrow sashing (half an inch, just enough so that I didn't have to match any seams), plus the backing and binding.  Overall, I really like the way everything kind of blends together.


I quilted this with the walking foot in a simple cross hatch, but instead of a square pattern I went for a diamond pattern this time.  It worked great, but I could use a little more practice on the size of the diamonds.  All together I only spent about 3 to 3-1/2 hours on this.  I'm not really sure but I know it was two podcasts and one afternoon.  This is the beauty of buying those thrifted blocks!


The runner finished at just 16 by 62 and is a perfect fit for my sideboard. It will now live there for several years, until the day comes when I look at it and decide that I want something different.  For now, though, it works! (It was quilted with a cream thread that blends really well, except on the darkest areas.  It's not really that stark in person. Or that wonky-looking, either.)

Hope everyone has a great weekend! Some workers came today and put up a big white tent on our neighbors' property, along with what looks like some beer taps.  Think they're having a party?  Hope I'm invited! (Do you think the tent will have AC? We'll see!)

Sharing at Confessions of a Fabric Addict, TGIFF, and Let's Bee Social.