Hi everyone! How was your week? Is anyone else having really strange weather? It's been in the 60s here and yesterday it rained like crazy. It was like a semi-pleasant, soggy, spring day. It is still December, isn't it? Just making sure I didn't somehow skip a whole season while I was in the library.
So, this week I didn't have a lot of time to sew because I was grading exams and doing other end-of-semester work. But I did finally finish and then actually sewed up this lovely thing:
Isn't she a cutie? Because of yesterday's rain, and the aforementioned job duties, I had to wait until today to get some pictures. It was still super-wet out, though, so if you see dark spots, it's not dirty, it just got a little damp.
Amazingly, there are three shades of gray in this quilt. I would never have guessed I would ever make a quilt that was mostly gray. It was a challenge, but I think I conquered it. I was afraid it would be too dark and drab, so I included the lighter gray cornerstones. I tried multicolored ones, but they looked bad. You wouldn't think they would, but they did.I think altogether the grays make the blocks really stand out.
If you remember, these are the 12 inch blocks from the Classic Stitches tutorials and are all scraps. I didn't start out thinking that I'd make another quilt from those blocks, but it just kind of happened, so I'm calling this quilt Serendipity--a happy accident.
Serendipity is probably my last finish for 2015. I don't know about you, but this has been a tough few months for me, and right now I'm exhausted. Plus, we are travelling for Christmas! We are heading back to Wisconsin and I can't wait. We will be staying with our son and are hoping for snow. I don't think that will happen, but it's nice to think about!
Now that two of my RSC15 quilts are done, next week I will post my plan for a new quilt for RSC16. In case you don't get a chance to stop by, though, I hope you all have a wonderful holiday, some time with your families, and some rest. And if you want it, maybe some time to stitch a few seams, too.
I have to go pack! Merry Christmas, everyone!
Sharing at Confessions of a Fabric Addict, Finish it up Friday. and soscrappy for RSC15.
Friday, December 18, 2015
Saturday, December 12, 2015
Finals week!
Hi everyone! Yes, it is finals week here at the Academic Quilter. I even have a final to give today (Saturday)! This means tons of paper instead of tons of fabric! Not to worry, though--it will all be over soon. And then there are many fun things in store towards the end of the month.
For a low-stress project for this week, I've been working on getting these blocks in order:
These are the 12-inch blocks I made as samples for the Classic Stitches tutorials. I didn't intend to make them when I started out, but they just kind of happened as a part of the tutorials. So now I'm putting them together into a throw quilt, because who needs a dozen blocks just laying around? They already look good together, so why not?
I got this fabric to use as a background for the blocks:
Yes, it's gray! I never buy gray, but I have to tell you that the manufacturers are coming out with some pretty nice grays now. This is a dark gray from the Good Neighbors line by Amanda Jean of crazy mom quilts. Isn't it great? This fabric feels so good. I liked the print so much that I also got some in orange, plus I may have purchased a few other pieces too. Hey, a girl's gotta have some pretty things!
I decided to frame the blocks with this light gray polka dot. I was going to use white, but that was very stark. The two grays also make the blocks really stand out. The frames will finish at only 1 inch wide, but I think they add a nice touch.
After I took this picture I started second-guessing myself. Is the gray frame too light? I can't decide.
Since the RSC was only 11 months, I also had to add another block to make an even 12. (I like symmetry.) I chose this orphan Wedding Ring block:
It's all solids, but they were scraps, and I figure that an orphan block is scrappy by definition, so into the quilt it goes. Why not?
Lots more to come on this quilt, but for now I have some student papers to read. I'll keep working on this off and on between grading sessions, and maybe I'll have something fun by the end of the week. Plus I have done no Christmas shopping yet! Ahhh!
Wishing you some stress-free sewing! When your college student gets home, give them a hug, because I know for sure some of those tests were hard!
Sharing at soscrappy for RSC15 and Oh Scrap! on Sunday. Happy sewing!
For a low-stress project for this week, I've been working on getting these blocks in order:
These are the 12-inch blocks I made as samples for the Classic Stitches tutorials. I didn't intend to make them when I started out, but they just kind of happened as a part of the tutorials. So now I'm putting them together into a throw quilt, because who needs a dozen blocks just laying around? They already look good together, so why not?
I got this fabric to use as a background for the blocks:
Yes, it's gray! I never buy gray, but I have to tell you that the manufacturers are coming out with some pretty nice grays now. This is a dark gray from the Good Neighbors line by Amanda Jean of crazy mom quilts. Isn't it great? This fabric feels so good. I liked the print so much that I also got some in orange, plus I may have purchased a few other pieces too. Hey, a girl's gotta have some pretty things!
I decided to frame the blocks with this light gray polka dot. I was going to use white, but that was very stark. The two grays also make the blocks really stand out. The frames will finish at only 1 inch wide, but I think they add a nice touch.
After I took this picture I started second-guessing myself. Is the gray frame too light? I can't decide.
Since the RSC was only 11 months, I also had to add another block to make an even 12. (I like symmetry.) I chose this orphan Wedding Ring block:
It's all solids, but they were scraps, and I figure that an orphan block is scrappy by definition, so into the quilt it goes. Why not?
Lots more to come on this quilt, but for now I have some student papers to read. I'll keep working on this off and on between grading sessions, and maybe I'll have something fun by the end of the week. Plus I have done no Christmas shopping yet! Ahhh!
Wishing you some stress-free sewing! When your college student gets home, give them a hug, because I know for sure some of those tests were hard!
Sharing at soscrappy for RSC15 and Oh Scrap! on Sunday. Happy sewing!
Friday, December 4, 2015
Sewing Lessons
Hi everyone! How are you today? I hope you all had a wonderful week and got some stitching time in. With it being December and the holidays coming, that can be difficult!
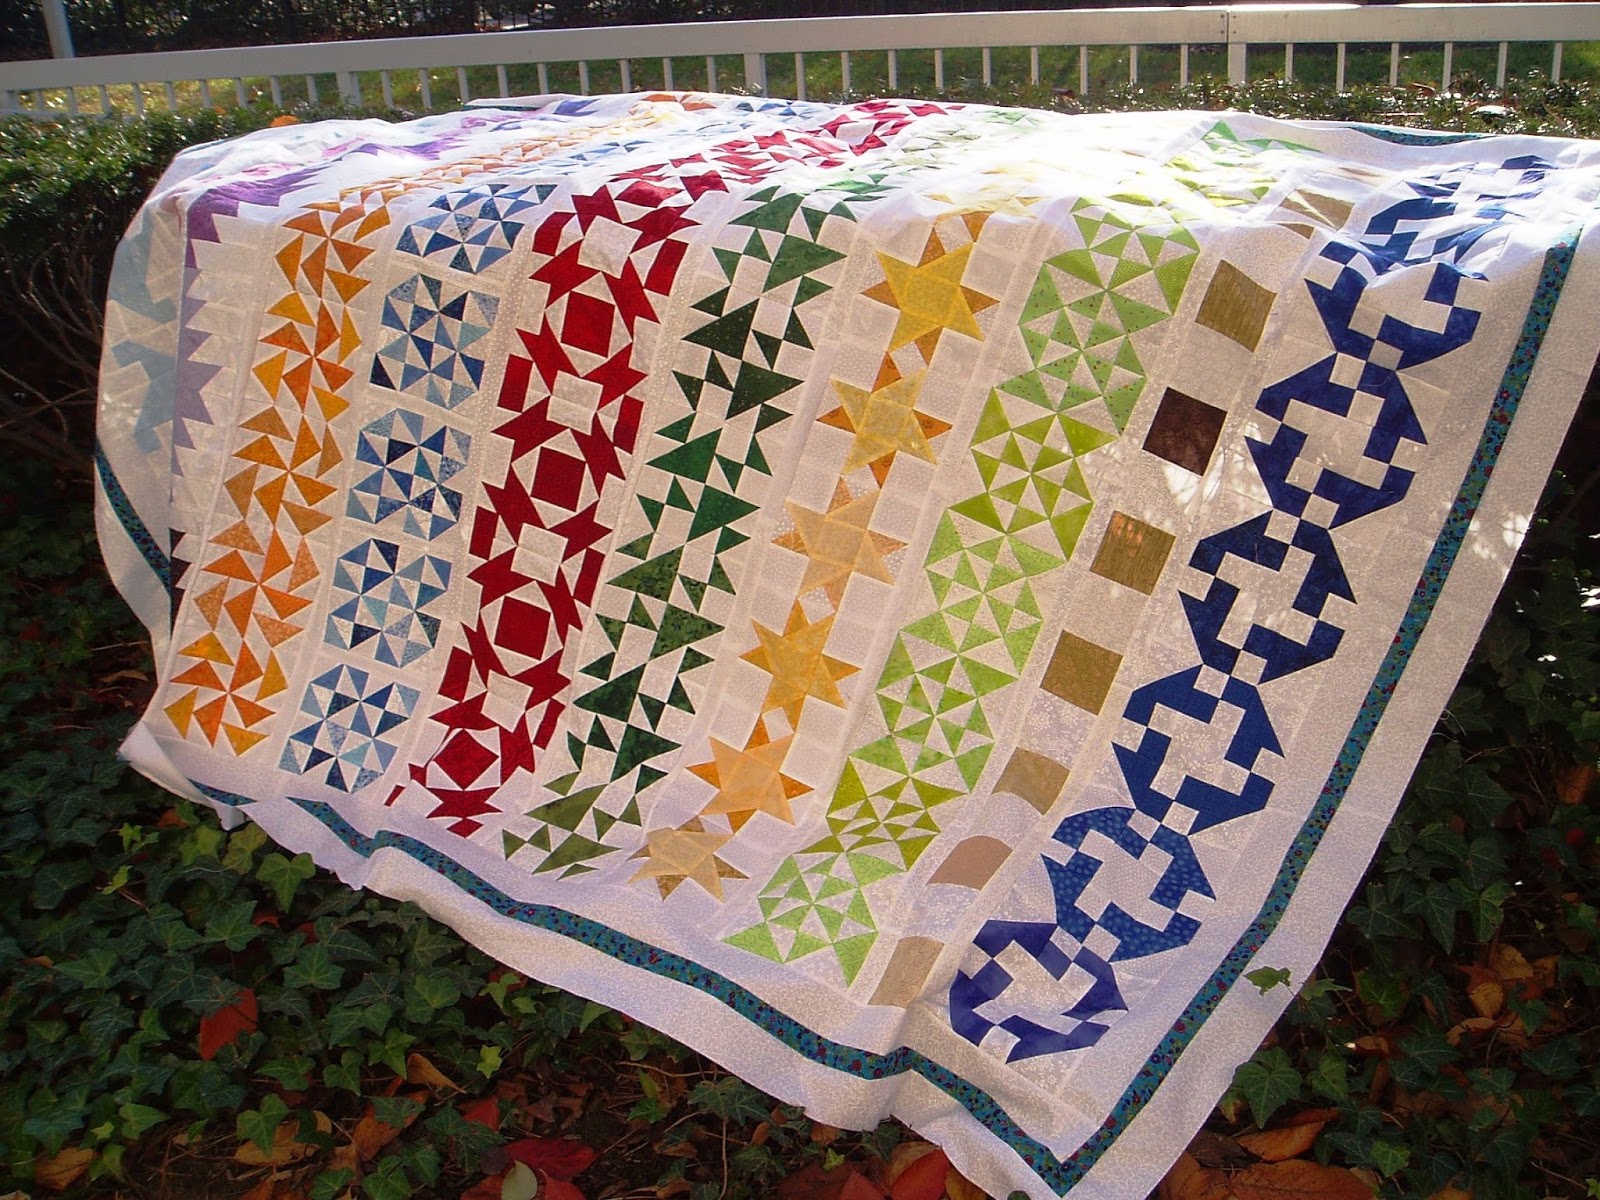
Today is a happy day here, because today I am showing off my finished Classic Stitches row quilt! Here she is:
Whoo-hoo! I am so, so happy with this quilt. It turned out slightly differently than I thought it would, but I still think it's quite lovely. It measures about 71 by 89 , which is a very nice snuggling size. I've named it "Sewing Lessons" in honor of all the women who taught me this very satisfying craft.
This quilt is the result of the Classic Stitches row quilt that I have been working on as a part of RSC15 all year. The rows--including all of the white on whites--were all constructed from scraps from my scrap bins. Miraculously, even all of those pieces did not seem to make much of a dent in the scraps!
Some of you may notice that the brown row is not the way it was planned. Yeah, I goofed up there, so I just made a simple checker row to give the quilt balance. It's not perfect, but it's okay.
If you have been quilting along with me, thanks so much for coming along! I hope you've enjoyed it and are happy with your finished quilts. If you haven't and would like to make your own (or even a few of the blocks), I put up tutorials for each of the rows once a month, and all of these tutorials are still available under the Classic Stitches tab at the top of the page. I plan to leave them up for good, so stitch away!
Just to wrap up the row quilt tutorials, I've added finishing instructions here at the end. The hard part of piecing the rows is already done, so why not finish it off with some nice sashing and a border?
Thanks to everyone who followed along, left a comment, and generally offered encouragement. My heart is truly full! If you've made a quilt or some rows or blocks from the tutorials, I'd love to see some pictures!
I already have a plan for another quilt next year, so be sure to come back for another challenge!
Finishing instructions:
The first step in finishing up this quilt is to gather and measure all of your rows. If you've made the rows like I did, each of the rows should measure 60-1/2 inches long. I found that some of the rows were very stretchy because there were so many pieces, so handle and measure carefully.
The next step was the hardest part for me: laying out the rows! I built my quilt from the center out. I knew that I wanted the red row to be the center, so I started with that one and then added rows above and below until I liked it and it looked balanced. It took me several tries until I liked it.
After you've got a layout you like, take a picture! It's easy to get mixed up.
Next is the sashing. I used a 1 inch finished sashing, which meant that I cut mine 1-1/2 inches. I thought that this gave enough space in between the rows and gave the quilt a nice size. I used many different lengths of white on whites, but if you are using yardage, you could cut 15 1-1/2 inch strips for the sashing.
Seam the lengths together and then cut to 60-1/2 inches. This is very important! If you don't measure, you could end up with very wonky rows. Use lots of pins! Pin the center and the ends of the sashing and stitch the sashing to the bottom of all rows but the last one. I found it best to stitch with the row on the bottom and the sashing on top. This eases in any extra length and makes everything nice and stable.
Join the sashed rows together in the order that you found pleasing. Again, I found it easiest to build from the center out.
Borders:
Once you have the center, there are several options for borders. First, you could be all modern and leave it just as-is (though you'll probably find it easier to quilt if you stitch a very narrow piece to all the edges to stablize all those seams).
You could add borders of any width all around. You could even build a multi-step border of different widths if you'd like. Any of these options would look fantastic.
If you haven't done enough piecing in making this quilt, you could take any one of the blocks and make it in a smaller size in any color for a border. Either the Philadelphia block or the True Blue block in black woud be a great border.
For my border, I went very simple in order to emphasize the piecing in the center. I used my new favorite border, a 3-step border composed of a 2 inch finished white border, a 1 inch finished multicolored border, and another 2 inch finished white border. I think it adds the perfect finishing touch to this quilt!
However you finish your quilt, I'm sure it will be spectacular! Thanks again for coming along on this journey with me, and enjoy your finished quilt!
Sharing at Confessions of a Fabric Addict, Finish it up Friday. and soscrappy for RSC15. Plus I'm trying a new one-- Oh Scrap! Hope to see you around the interwebs!
Today is a happy day here, because today I am showing off my finished Classic Stitches row quilt! Here she is:
![]() |
| Sewing Lessons |
Whoo-hoo! I am so, so happy with this quilt. It turned out slightly differently than I thought it would, but I still think it's quite lovely. It measures about 71 by 89 , which is a very nice snuggling size. I've named it "Sewing Lessons" in honor of all the women who taught me this very satisfying craft.
This quilt is the result of the Classic Stitches row quilt that I have been working on as a part of RSC15 all year. The rows--including all of the white on whites--were all constructed from scraps from my scrap bins. Miraculously, even all of those pieces did not seem to make much of a dent in the scraps!
Some of you may notice that the brown row is not the way it was planned. Yeah, I goofed up there, so I just made a simple checker row to give the quilt balance. It's not perfect, but it's okay.
![]() |
| Poor unfinished brown blocks! |
Just to wrap up the row quilt tutorials, I've added finishing instructions here at the end. The hard part of piecing the rows is already done, so why not finish it off with some nice sashing and a border?
Thanks to everyone who followed along, left a comment, and generally offered encouragement. My heart is truly full! If you've made a quilt or some rows or blocks from the tutorials, I'd love to see some pictures!
I already have a plan for another quilt next year, so be sure to come back for another challenge!
Finishing instructions:
The first step in finishing up this quilt is to gather and measure all of your rows. If you've made the rows like I did, each of the rows should measure 60-1/2 inches long. I found that some of the rows were very stretchy because there were so many pieces, so handle and measure carefully.
The next step was the hardest part for me: laying out the rows! I built my quilt from the center out. I knew that I wanted the red row to be the center, so I started with that one and then added rows above and below until I liked it and it looked balanced. It took me several tries until I liked it.
After you've got a layout you like, take a picture! It's easy to get mixed up.
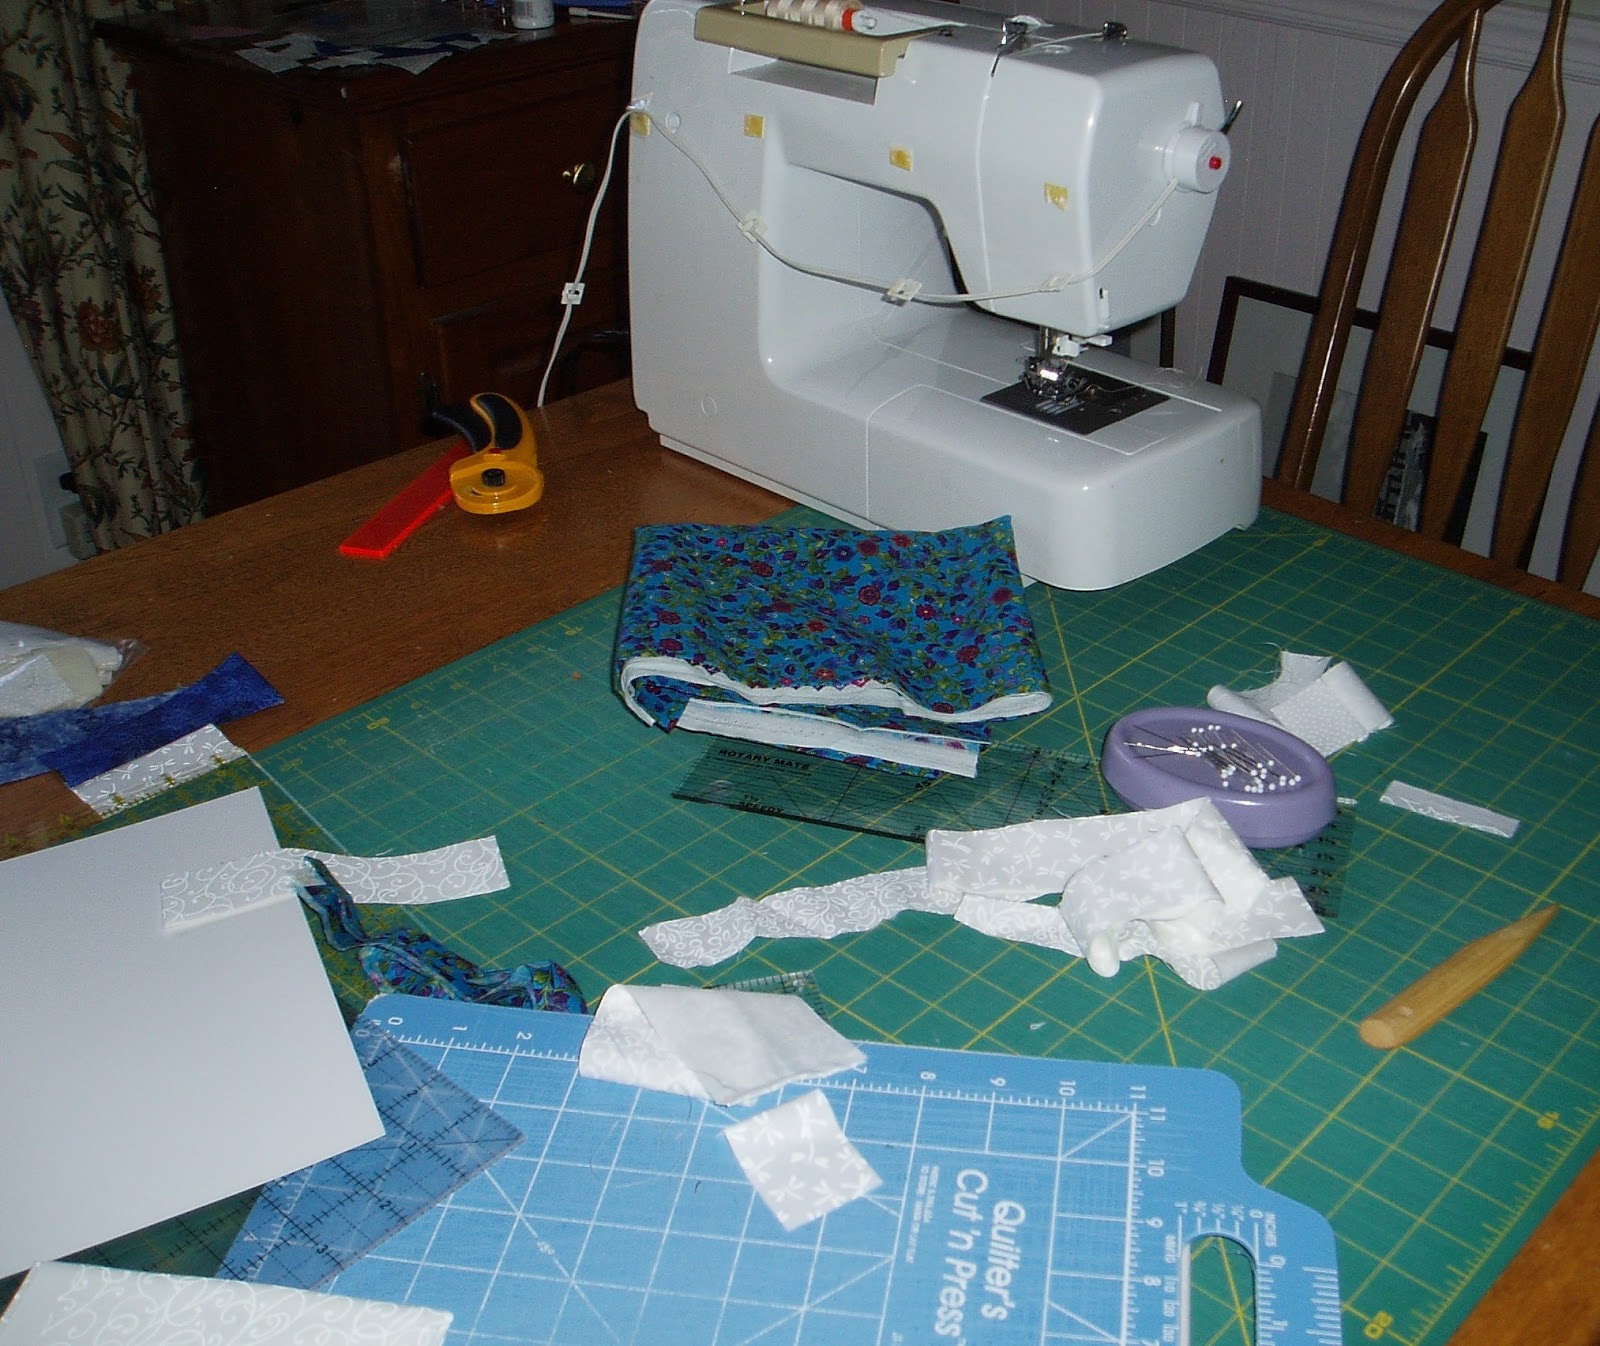
Next is the sashing. I used a 1 inch finished sashing, which meant that I cut mine 1-1/2 inches. I thought that this gave enough space in between the rows and gave the quilt a nice size. I used many different lengths of white on whites, but if you are using yardage, you could cut 15 1-1/2 inch strips for the sashing.
![]() |
| Someone's going to have to take care of all that mess. |
Seam the lengths together and then cut to 60-1/2 inches. This is very important! If you don't measure, you could end up with very wonky rows. Use lots of pins! Pin the center and the ends of the sashing and stitch the sashing to the bottom of all rows but the last one. I found it best to stitch with the row on the bottom and the sashing on top. This eases in any extra length and makes everything nice and stable.
Join the sashed rows together in the order that you found pleasing. Again, I found it easiest to build from the center out.
Borders:
Once you have the center, there are several options for borders. First, you could be all modern and leave it just as-is (though you'll probably find it easier to quilt if you stitch a very narrow piece to all the edges to stablize all those seams).
You could add borders of any width all around. You could even build a multi-step border of different widths if you'd like. Any of these options would look fantastic.
If you haven't done enough piecing in making this quilt, you could take any one of the blocks and make it in a smaller size in any color for a border. Either the Philadelphia block or the True Blue block in black woud be a great border.
For my border, I went very simple in order to emphasize the piecing in the center. I used my new favorite border, a 3-step border composed of a 2 inch finished white border, a 1 inch finished multicolored border, and another 2 inch finished white border. I think it adds the perfect finishing touch to this quilt!
However you finish your quilt, I'm sure it will be spectacular! Thanks again for coming along on this journey with me, and enjoy your finished quilt!
![]() |
| Windy! |
Sharing at Confessions of a Fabric Addict, Finish it up Friday. and soscrappy for RSC15. Plus I'm trying a new one-- Oh Scrap! Hope to see you around the interwebs!
Tuesday, December 1, 2015
Life happens
Hi everyone! Had enough of the turkey leftovers yet? We have none this year, as we left them all at my daughter's house! She did a great job with the food and we had a lot of fun. Except, for some reason we thought that it would be good to drive from Philadelphia to Maine. It was a good idea on paper. For those of you in the other parts of the country, did you know that the entire East Coast is essentially one gigantic city? Zero fun to drive through!
So, today I was planning to post my finished Classic Stitches row quilt, but that has to be delayed until Friday. Sadness! What happened? Well, life happened and I just didn't finish it in time to take pictures and get everything written. I could have done it, but I chose to spend the time with my family instead. I think I made the right choice.
I do have some sneak peeks of my quilt, though!
This was me trying to arrange my rows. Maddening! So many different ways to arrange things!
I also had to fix a couple of errors. Even working on it for a year, I made mistakes, mostly in measuring the sashing because I apparently can't divide by 2:
But I got those fixed and got *almost* finished, so I'll definitely show it on Friday. Watch this space!
Now that that's mostly out of my way, I also pulled out this set of fabric and blocks:
Wonder what I'll do with those?
Finally, here is a bonus picture of the hubs with our daughter's cats that our whole family found amusing:
Not only best husband ever, but also best cat perch ever!
Everyone have a great week, and I'll see you all back here on Friday!
Sharing at Linky Tuesday, Let's Bee Social, and WIP Wednesday.
So, today I was planning to post my finished Classic Stitches row quilt, but that has to be delayed until Friday. Sadness! What happened? Well, life happened and I just didn't finish it in time to take pictures and get everything written. I could have done it, but I chose to spend the time with my family instead. I think I made the right choice.
I do have some sneak peeks of my quilt, though!
This was me trying to arrange my rows. Maddening! So many different ways to arrange things!
I also had to fix a couple of errors. Even working on it for a year, I made mistakes, mostly in measuring the sashing because I apparently can't divide by 2:
![]() |
| Yep, that's going to be a problem. |
But I got those fixed and got *almost* finished, so I'll definitely show it on Friday. Watch this space!
Now that that's mostly out of my way, I also pulled out this set of fabric and blocks:
Wonder what I'll do with those?
Finally, here is a bonus picture of the hubs with our daughter's cats that our whole family found amusing:
Not only best husband ever, but also best cat perch ever!
Everyone have a great week, and I'll see you all back here on Friday!
Sharing at Linky Tuesday, Let's Bee Social, and WIP Wednesday.
Subscribe to:
Posts (Atom)