Tuesday, June 13, 2017

Two new projects

Hi everyone!  Are you melting?  We sure are!  It's been in the 90s the last several days, and it's not supposed to end for a couple more days. The first day was nice, but I'm totally over it now.  Although the sunshine is very nice!  On a completely unrelated note, has anyone ever used the films that you put over the windows to block out some of the heat?  No reason, just wondering if they work.

So, with it being so hot and all, gardening and outdoor painting is out of the question.  Instead, I started two new projects.  Of course!  What else is there to do?  Remodel the kitchen?  Write a paper?  Work on my next book?  No, I think playing with some fabric wins out over those every time. 

Here's the first thing I've started:


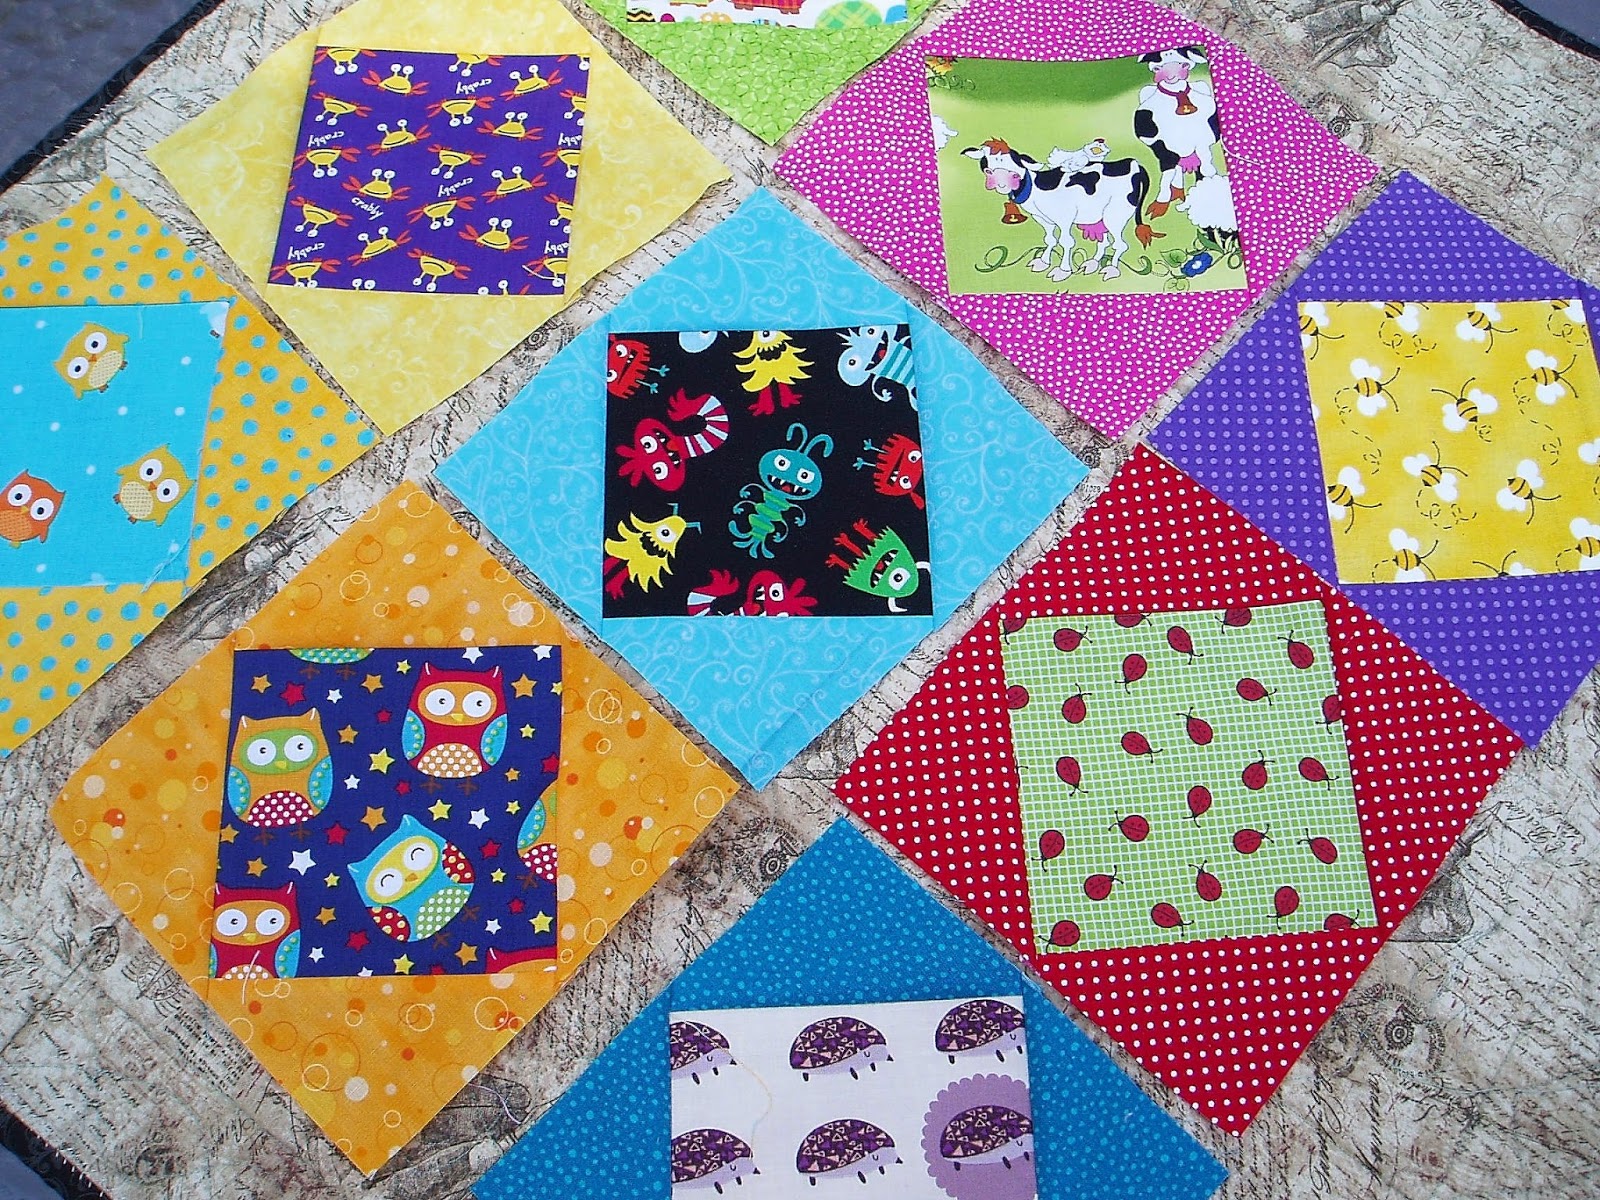
This is the beginning of an I Spy quilt!  I think it's going to be darling. I mean, just look at those fabrics! Most of them came from friends,who all have much nicer fabric than I do, though I did have a few myself.  I thought about a number of different ways to use them, but I settled on a simple square in a square block to use up some scraps and showcase the fabrics.  I plan to set these on point with some fun setting triangles, though I don't have the specific fabric yet.


The centers of these blocks are 5 inch squares, and the sides are made from 4-inch squares cut in half.  This will make the finished blocks 6-3/8 inches square.  Since this is going to be a kid's quilt, I'll probably only need 35 blocks or so for a decent size. 


So, there's one project, and it's a lot of fun to work on, so I'm thinking it will go fast.  The fabric is fun, of course, but it also makes me happy that this little quilt will likely end up either with my tiny grandson or in my "grandma stash" for when little ones visit here.  Actually, I think my grandson would love this, and we'll be visiting him later this summer, so I have lots of incentive to work on it.

The other project that I'm starting is the June quilt along with Amanda at crazymomquilts.  She's running the quilt along for a throw-sized string quilt on her blog this month and I decided to go ahead and join in!  Here are the fabrics I'll be using:


I know I just made a string quilt, but I do have a ton of pink and green fat quarters and pieces, and I'll throw some yellow in, too.  The background is a cream with a pale pink polka dot.  They look pretty pale in this picture, but I'm sure they'll look great in the quilt together.  And for those of you who know me, you know that I didn't forget these, too:


Yep, tiny little skinny strings.  I just can't resist them, but I swore to myself that I'd try to avoid the smallest ones this time.  We'll see how that works out.

Finally, there's one thing the hot weather has been very good for (warning, this is a terrible picture):


Tomatoes!  My lone tomato plant already has 4 tomatoes on it.  I can hardly believe it.  The thought of fresh tomatoes before August has really warmed my Midwestern heart.  I can't wait!

I hope the heat breaks soon for all of us.  I've planted 4 trees so far this year and I'm worried about one of them, and the heat isn't helping.  Until it cools off, I'll be alternating between the sewing room and the library.  Good thing both of them are air conditioned!  

Sharing at Linky Tuesday and Let's Bee Social.

Friday, June 9, 2017

On deck

Hi everyone, and welcome to Friday!  It always feels good to make it through another week, doesn't it?  Even if you are off work--for whatever reason--Friday just always feels good.

Today I have another little finish to show!  I know I've had a roll of small finishes, but it feels good to get them out of the closet.  And with the kitchen currently in pieces it just feels good to have *something* finished.  So here's today's little finish:


I'm calling this little quilt On Deck, because that's where it's going to be used all summer.  It's about 30 inches square and fits the little table we have on our deck perfectly.  We used it out there for supper last night, actually, and then I had it out there for breakfast this morning.  We've never had a deck before, but we are loving it and I'm out there as often as I can be.  I'm actually writing this on the deck right now.  Really!


I found this little quilt in a box of clothes. Why was it in with the clothes?  Who knows?  I know I made it several years ago as part of a quilt group that I used to belong to, but I thought that I had given it away long ago.  Not really my colors or my favorite fabrics, but it looks good together.


When I found it in the box, it was already basted and had some ditch quilting in it.  Not a bad place to start!  All I did then was stitch some free-motion motifs in each square and then bind it to finish it off.


I thought the stitching would go quickly, but 4 hours later I was still at it.  In retrospect I should have chosen something more simple, but right now I need all the practice I can get.  The quilting is really imperfect, but by the time I stitched the last square it was getting a lot better.


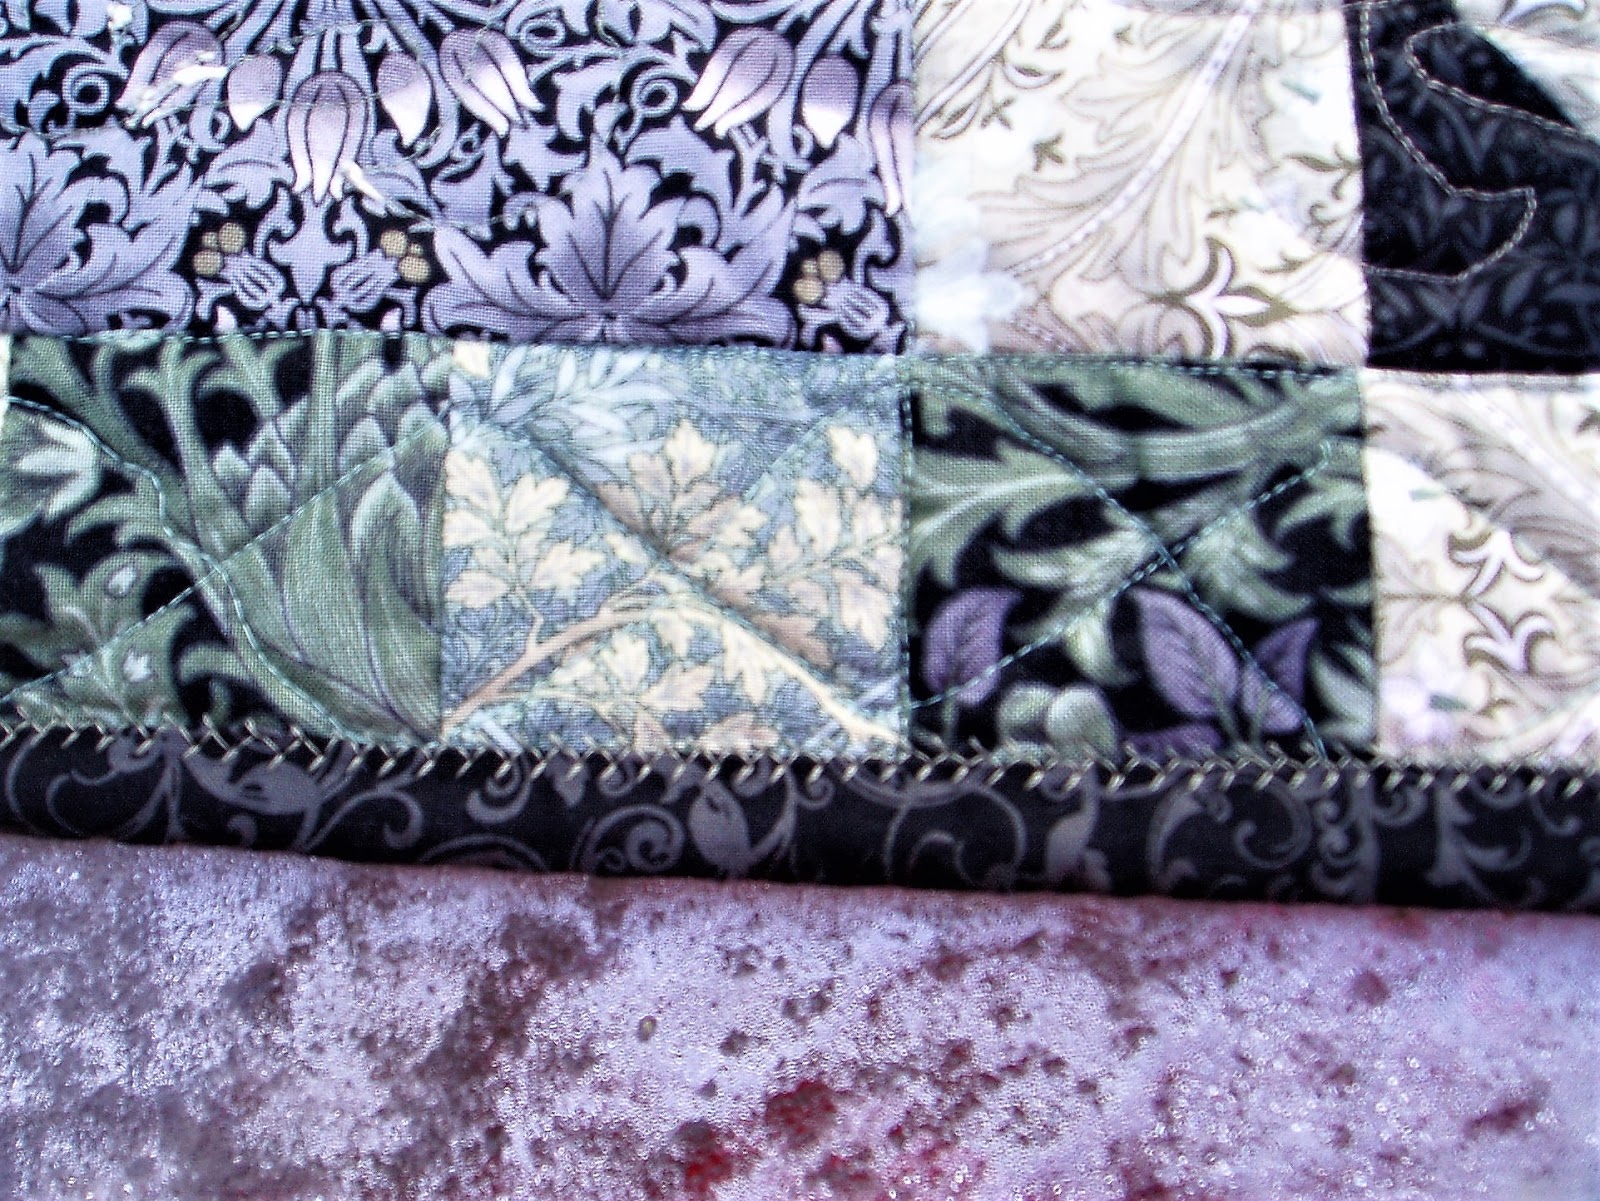
I used a decorative stitch on the binding, which is a finish that Preeti and I saw on several quilts last weekend.  (More on that in a minute.)  It worked okay, but it did keep bunching up and wandering.  Those stitches are really meant for garments and the heaviness of the quilt really kept messing it up.  It also took a *lot* of thread.  I'm not sure that I would ever do it again.  I think if I wanted a decorative stitch I might stitch it on the binding itself and then stitch the binding to the quilt.


So there's our little deck quilt!  Don't worry, I'm bringing it in every time I come in, but it's nice just to have it out there.  Patio tables always need some dressing up, don't they?

In other fun news, last weekend I got to go to a quilt show with Preeti of Sew Preeti Quilts.  We had a great time!  Preeti had two quilts hanging in the show, and here she is with her beautiful Twitter Feed quilt:


This quilt is awesome in person and was a real hit.  As one of her friends said, people were "flocking" to it!  There were some other quilts too, but I didn't take other pictures.  And can you believe that we didn't buy a single thing?  There was just too much to see to spend time shopping!  It was a great day.

I hope everyone has a wonderful weekend.  We have some more home improvement work to do, and it may involve a paint sprayer.  This is sure to be comical, and it may mean takeout for supper.  Yay!


Sharing at Finished or Not Friday, Confessions of a Fabric Addict, and crazymomquilts.

Tuesday, June 6, 2017

Constellations--Yellow

Hi everyone, and welcome back to the Constellations quilt!  The color for this month is a bright, happy, sunny yellow, perfect for the beginning of summer.  It's a gray day here today, but there is a lot of brightness going on in the sewing room with this month's block.  This month we'll also finish the second row of the quilt center, which means that 50% of the quilt will be done!

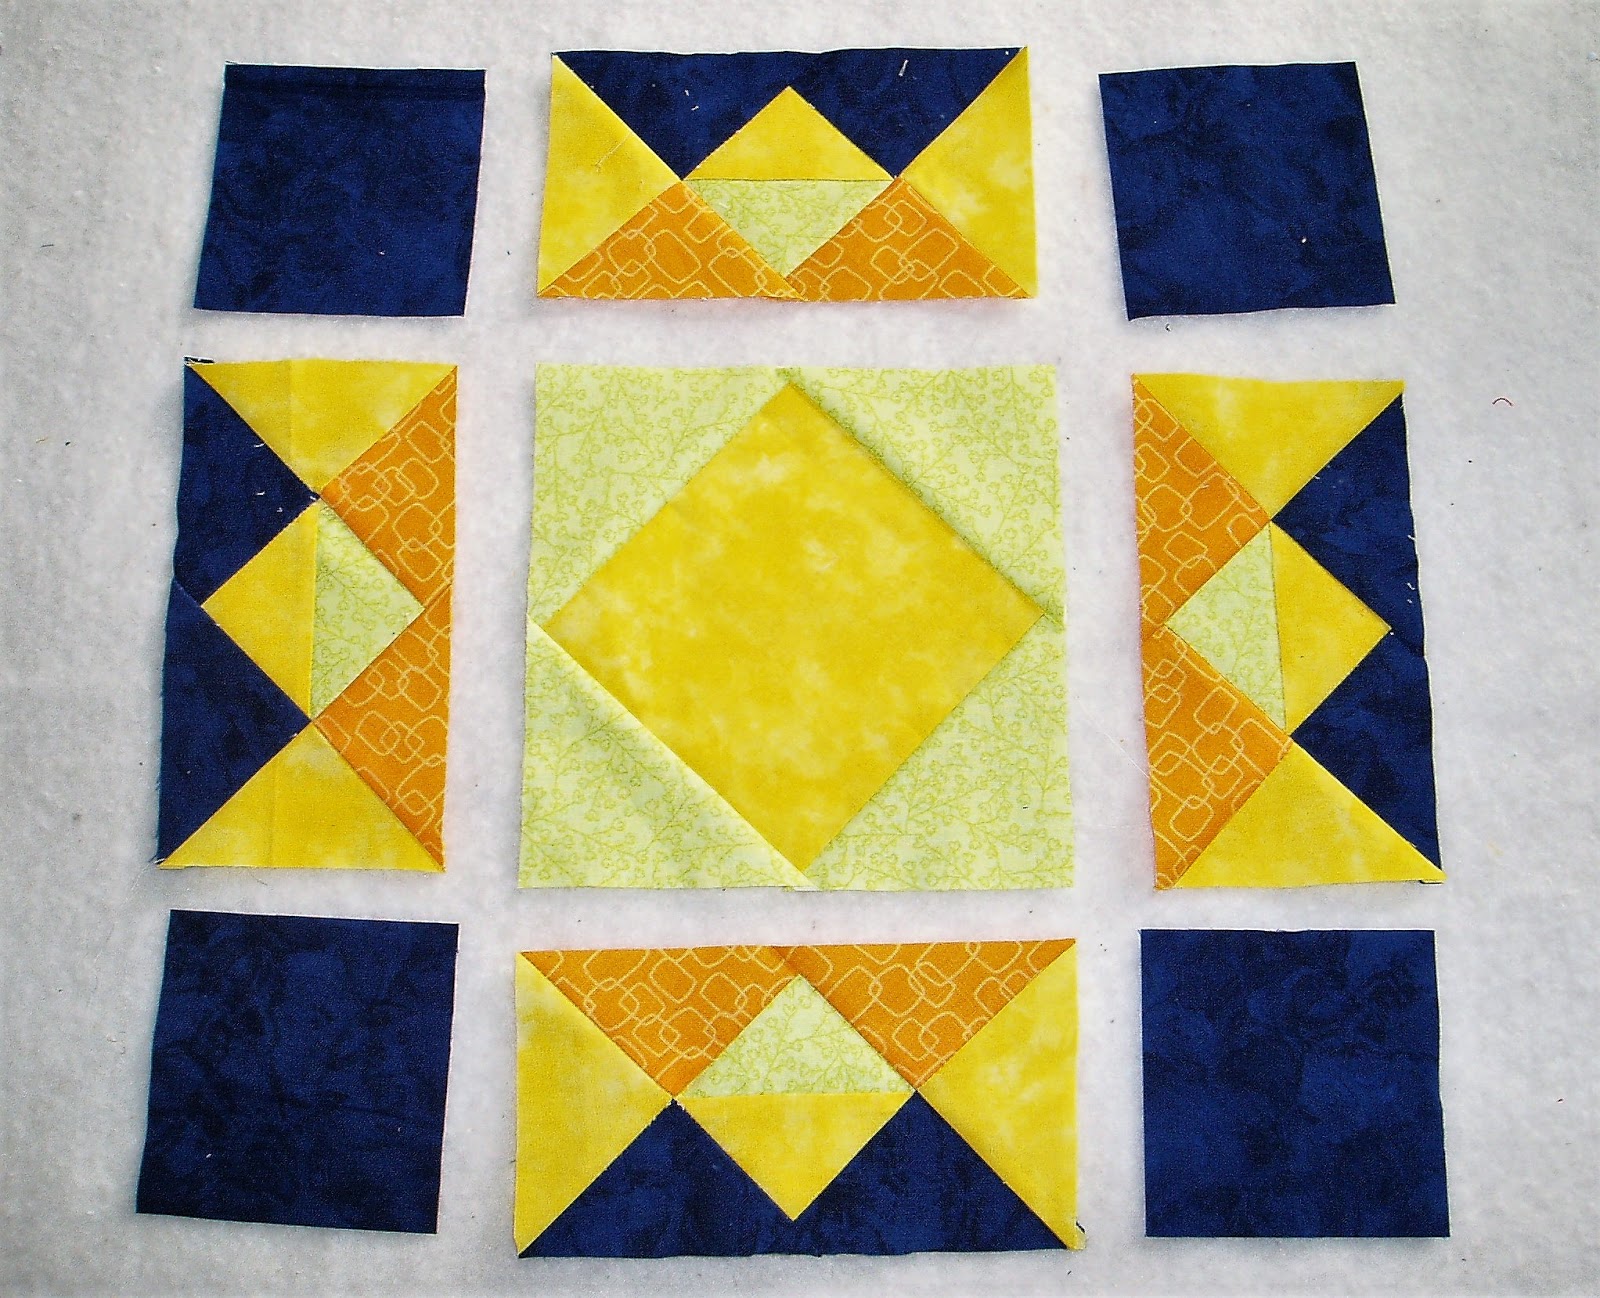
Here is this month's block:


This block has various names from various eras.  The earliest it appeared was as Georgetown Circle, a Carrie Hall block from 1899.  Nancy Cabot called it Georgetown Puzzle, and much later it was called Crown of Thorns.  Whatever we call it, it makes a lovely block.

True fact: our sun is a yellow star.  I think this block looks very sun-like when made up in these colors.  Yellow can be a hard color to use, mainly because it doesn't play very well with others.  You can use whatever colors you'd like, but I found success by choosing a strong yellow (not a pastel) and using accent colors with a yellow undertone--a yellow-green and a yellow-orange.  The yellow liked these partners, but you might also have success using colors from the cooler side of the color wheel.

Cutting:


Pieces marked with a * can be oversized and cut down later in the process.  If you have any doubts about your 1/4 inch seam, oversize your pieces by about 1/4 inch.  Cutting them down in the construction process will not affect the final block.


From the background, cut:

4 3-1/2 inch squares
2 4-1/4 inch squares*

From the yellow:

2 2-7/8 inch squares *
2 4-1/4 inch squares*
1 4-3/4 inch square  OR 2 3-7/8 inch squares* (see directions)

From accent 1 (Green):

2 2-7/8 inch squares*
2 3-7/8 inch squares

From accent 2 (Orange):

2 4-14 inch squares*

To complete the quilt section, cut from the background:

1 2-1/2 inch by 12-1/2 inch strip
1 2-1/2 inch by 14-1/2 inch strip

Construction:

As before, first we'll make some units and then put the units together into a block.  I should say that I forgot to take some pictures while I was making this block, but we all know what an hst looks like, right?

First, use the 2-7/8 inch yellow and green squares to make 4 yellow/green hsts.  These hsts should measure 2-1/2 inches each.

Next, make the block center.  Use the 4-3/4 inch yellow square and the 2 3-7/8 inch green squares to make a square in a square block.  Cut the green squares in half from corner to corner to make 2 triangles each.  Stitch the long sides of the triangles to the sides of the square, as shown:


It helps to finger press the centers of all the pieces and match them up before stitching.  This unit should measure 6-1/2 inches square.

Alternate method:

Use the 2 yellow and green 3-7/8 inch squares to make 4 3-1/2 inch hsts.  Join these with the yellow at the center to make a square in a square unit.  This should measure 6-1/2 inches square.

Next up are some orange and yellow units.  Take the 2 yellow and orange 4-1/4 inch squares and cut them from corner to corner twice each to make 8 smaller triangles of each color.  Lay them out as shown and stitch 4 of each pair:

Cut from scraps for illustration purposes only!  Yours should look better!

Press to the orange.

Assembly:

Take the 4-1/4 inch background squares and cut them in half from corner to corner twice to make 4 smaller triangles each, for a total of 8.  Join these small triangles to the yellow/ green hsts as shown:


It may be hard to tell from the picture, but the background triangles should be joined to the yellow side of the hsts. Press to the background fabric so that later seams will nest.

Next, add the orange and yellow units to the units you just made, turning them so that the orange triangles meet up with the green side of the hsts:


Your seams should nest to make alignment a little easier.  Press towards the orange and yellow units.   These units should measure 3-1/2 by 6-1/2 inches.  Adjust to make the unit the proper size, making sure that you have the 1/4 inch seam allowance past the points.  NOTE:  My hsts are the wrong size because I was adapting the pattern from an older one into one that uses more standard sizes and easier construction, so yours will likely look a little different.  Don't worry about it--yours are the correct measurements.

All that's left to do now is lay out the block units as shown, including the 3-1/2 inch background squares for the corners:


Join the units into rows and the rows into a completed block.  Give it a good press, stand back, and admire!


To complete this quilt section:

To finish section 5, add the 2-1/2 inch by 12-1/2 inch strip to the bottom of the block and press.  Stitch the 2-1/2 inch by 14-1/2 inch strip to the right side of the block.  Press well.

Section 5

Join section 5 to the completed section 4, keeping the 2-1/2 inch background strip on the block to the right.


Measure the two rows that we have completed.  Both measurements should be the same.  If not, adjust at the seam in the second row between sections 4 and 5.  Once the measurements match, stitch the two rows together.  The seam between sections 4 and 5 should match that between sections 2 and 3, and the 2-1/2 inch strips on the sides of the rows should align. but no other seams will necessarily match.

I found it helpful to stitch with the first row on the bottom so that I could keep the seam allowances in the second row from flipping and keep an eye on my points.  I also found it very helpful to pin as it is a long seam.

Once the seam is together to your satisfaction, press well.


Congratulations!  Half of the quilt center is now complete!  It's really starting to look like a sky crowded with stars of all sizes and intensities.  I hope your quilt is coming along well also.

Thanks for coming this far, and be sure to come back on July 5 for the beginning of row 3 and yet another fun star block!

Updated to add that if you are on Instagram, post your blocks using the hashtag #constellationsbom  so everyone can see them!

Sharing at Linky Tuesday, Let's Bee Social, and soscrappy for RSC17.
Friday, June 2, 2017

Start of summer

Hi everyone!  How was your week?  It's feeling a lot like summer here, but not quite as warm as it will be in a month or so, so I did a bit more gardening.  Nothing like the "big dig" of last weekend, but things keep blooming here, and it's always a surprise.  It looks like we'll have some day lilies shortly, and there are all kinds of other plants I can't identify or haven't seen in person before.  Yellow irises, for example.  I didn't know they came in yellow!

Of course, I also did some stitching, just for rehabilitation purposes, you know.  I finally finished up the string quilt!  Here she is:


Is that not a happy quilt?  This is the Scrap Happy Rails pattern from Amanda Jean Nyberg's book No Scrap Left Behind.  I made mine smaller than the pattern, mainly because this was all the scraps I had that I wanted to use up.  If you recall, I found a bag of coordinated floral scraps that I had saved, and I cut those up for this quilt.  My top is about 48 by 60, a decent lap size.


What could I call this beauty but Start of Summer?  I have really lost my taste for florals, but they look fresh and summery in this quilt.  And I used up every bit of those scraps.  I mean *every* bit:


Yep, that little pieced string in the center of the photo is about a half-inch wide.  Someday I will learn to keep and use only the larger scraps, but that day is not today, clearly.  Seriously, there is nothing left.  I was sweating out the last two blocks, but managed to eke them out. 


This quilt top was really easy, but it was seriously labor intensive.  All the strings!  I didn't have long enough pieces for more than a couple of short strip sets to cut into sections, so the vast majority of these strings were stitched one at a time.  I worked on two blocks at a time so I could always have something going through the machine, which worked out pretty well.  If I were a smart person I would have chopped all the strings to the correct length before I started stitching anything, but I didn't.  I just cut them as I added them to the sections.  That slowed me down a lot!


This little quilt is destined for great things!  I've signed up at a local quilt shop to take the required class so that I can rent time on their longarm, and this top will be one of the practice quilts.  After that it will likely be donated, but I expect it to teach me a lot first!

I also got a great surprise in the mail this week-- check out this beautiful little mini that Janine at Quilts from the Little House sent me:


Isn't that adorable?  It's already hanging on the wall in my sewing room.  Much too pretty to be setting lemonade on! Thanks so much Janine!

One more thing-- as I said above, there are a lot of plants here that I can't identify.  Does anyone know what this shrub is?


This is also shown in the second picture above, and it just bloomed this past week.  The flowers are lovely, but I don't know what it is or anything about it.  And just how do you get rid of pachysandra?  It's everywhere!  Any help appreciated!

Have a wonderful weekend everyone! 

Sharing at crazymomquilts, Confessions of a Fabric Addict, Finished or Not Friday, and Oh Scrap!