Hello everyone, and welcome back to the Hands2Help Comfort Quilt Challenge!

To those of you who are new here, I'm happy to welcome you to the Challenge. You can read all about what this involves, our comfort quilt recipients, and the calendar on the kickoff post right HERE. For those of you who have been here before, thanks for stopping by for today's quilt tutorial! I know a lot of people have already started quilts for the Challenge, and this might be one you would consider as well, especially if you have a lot of scraps to use up.
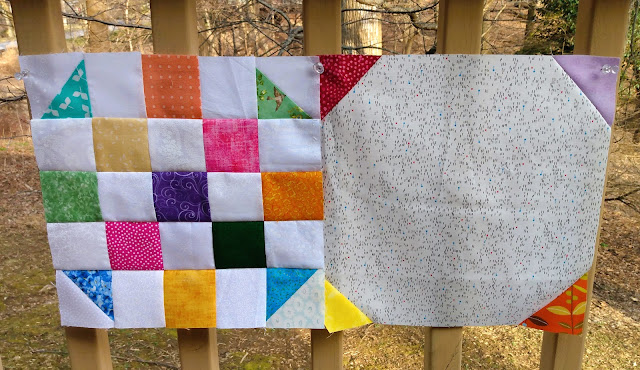
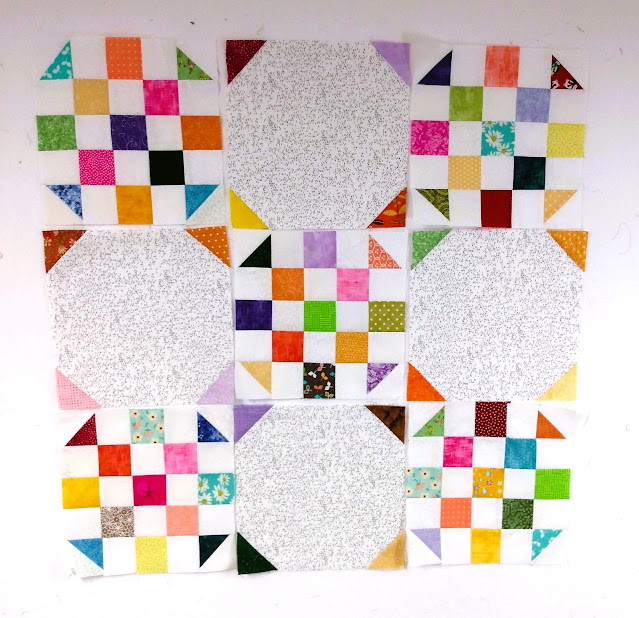
Today, as promised, I'm showing a quick quilt that will be great for a number of recipients, plus it uses a bunch of scraps and pieces together quickly. Here are the two blocks we're using:
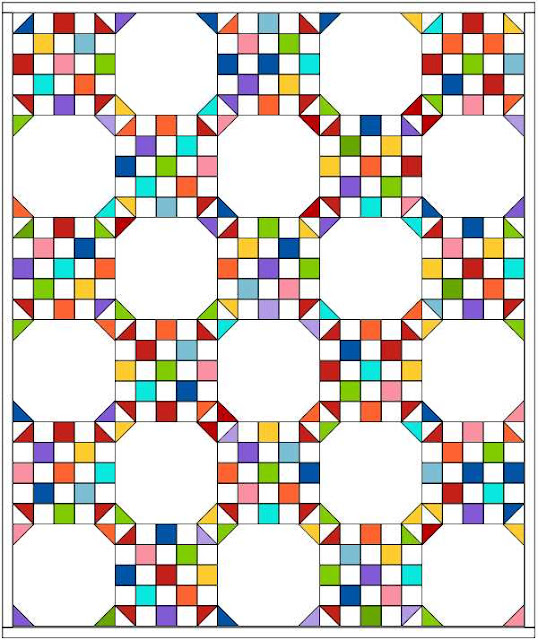
And here is a mock-up of the finished quilt (no, of course I haven't finished one yet!):
If you're anything like me, you have a bunch of leftovers from other projects, including 2-1/2 inch squares and hsts. I have literally hundreds of both of these, so this is what I'm using to create this quilt.
This quilt finishes up at 50 by 60 without any borders, which makes it a great medium size. You can always expand it to make it bigger, and the math is very easy because the blocks finish at 10 inches each. A border or two would also bring up the size.
To make the quilt as shown (without borders), you will need:
- 195 multicolored 2-1/2 inch squares (unfinished, to finish at 2 inches in the quilt)
- 60 2-1/2 inch (unfinished) half-square triangles
- 180 white, white on white, or other neutral 2-1/2 inch squares
- about 1-1/4 yards of a neutral or a small print for the alternate blocks
- If you want to make the quilt in one color, you'll need about 1-1/2 yards of fabric for the primary blocks.
Okay, let's get started with the alternate blocks:
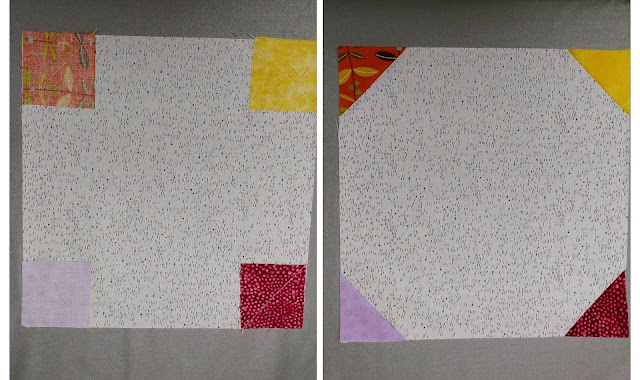
The alternate blocks are just snowballs, made with 60 of the multicolored 2-1/2 inch squares, one at each corner. Cut 15 10-1/2 inch squares from the yardage. If you're careful with removing the selvages and have 42 usable inches, you should be able to get 4 squares out of a 10-1/2 inch width of fabric cut.
Add a 2-1/2 inch square to each corner of a 10-1/2 inch square. Stitch diagonally, then trim and press. You can draw lines if you want to, but I used the Diagonal Seam Tape from Cluck Cluck Sew, which works great. Do what works for you, and make 15 snowball blocks.
Next are the primary blocks:
The primary blocks are actually a block that was featured in the Squared Away BOM that I did with Angela at soscrappy in 2018. They're called Around the Corner and are a Nancy Page pattern from 1920. If you want to make your blocks all one color, I have strip piecing instructions for the block right HERE. If you want a multicolored block, they are still very easy!
First, use any method to make 60 2-1/2 inch half-square triangles in different colors. If you are doing the eight-at-a-time method, you'll start with 6-inch squares for slightly oversized hsts to trim down.
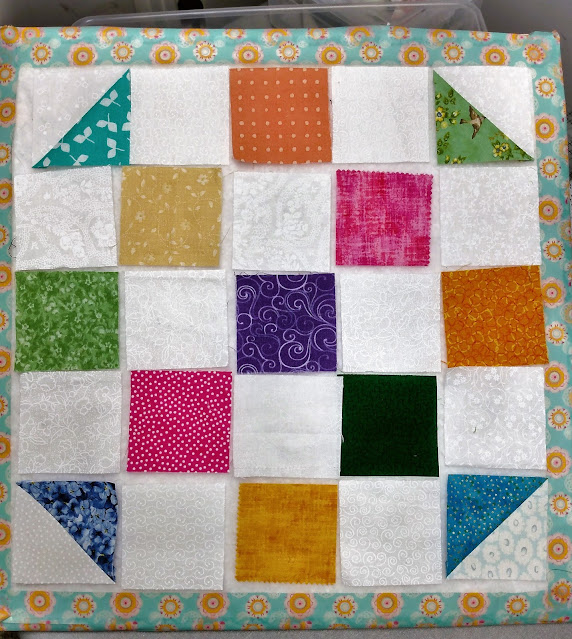
Then use 4 of the hsts, 9 multicolored squares, and 12 of the white or other neutral squares and lay them out as shown above. Remember that the darker part of the hsts point in, toward the center, not out towards the edges.
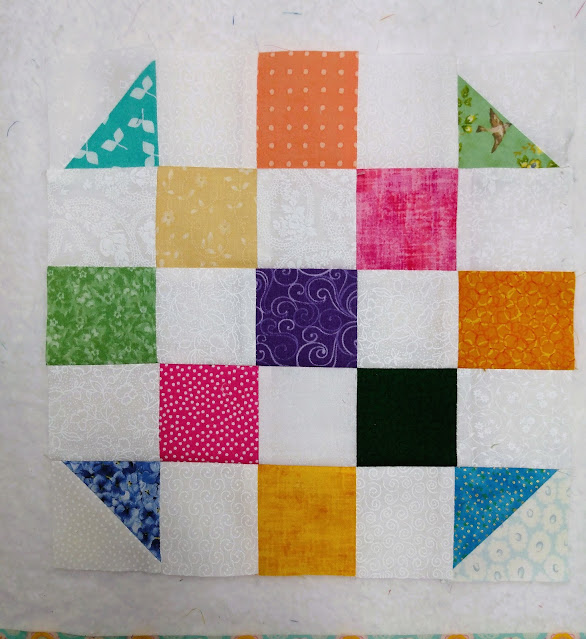
Join the squares into rows and the rows into a finished block. Press well and admire! Make 15 of these blocks, which should measure 10-1/2 inches to finsh at 10 inches in the quilt.
Finish the top:
Now it's just a matter of following the diagram in the mockup and laying out the blocks and alternate blocks. Here is how my quilt top looks so far:
Yeah, I only had time to get a little bit finished, but at least you can see how it will look. The blocks did go together really quickly, and I think that cutting will be the most time-consuming part. Well, cutting, and then deciding where all the colors go, of course!
That wraps up this quilt tutorial! I hope some of you will give it a try, if for no other reason than it will really clear out your scrap bins, and it will make a really colorful quilt that's sure to be appreciated and loved.
Schedule reminders:
Next Sunday, on March 6, I'll be back with another quick tutorial, then we will have an opportunity for you to link up your own original tutorials or free patterns on March 27. After that, on April 3, April 10, April 24, May 1, and May 8, there will be guest bloggers sharing their own tutorials and patterns. That's a lot of good quilt ideas!
Just to answer a few questions that I've had:
When do signups start? Official signups to be eligible for prizes start March 20, but you can certainly start sewing now.
Can I send a quilt now, or do I have to wait for signups? Yes, you can send a quilt now if you have one finished! I'm sure they'll all be thrilled to get it.
If I donate to another organization, will my quilt still count for the challenge? Yes! At the end, there will be a form to fill out so that we can count the quilts, and you can list your quilt and organization there. It will definitely count!
Where can I get the Hands2Help button? Scroll all the way down on the kickoff post. You will find the button code there. Thanks!
Thanks for coming along today, and for all the support you've already shown for this year's challenge. Be sure to look back at the kickoff post for our quilt recipients and the sizes they are requesting, then dig in to your scraps and get started. Happy stitching!
9 comments:
That's a great pattern for using up scraps, and if you have a die cutter, those little squares would be cut in a jiffy!
Thanks for the tutorial, Mari, because you KNOW that I've got scraps!!! :o))
Super Cute idea!!!!
Mari, that is such a great design, and so perfect for the scrappy look so many of us love! I'm going to have to give those blocks a try!
So cute Mari. For people who might have little time and also have a large scale fabric they love, it would be nice to skip the checkerboard square and just do the large scale fabric as the background and coordinated solids as the snowballed corners. Does that make sense? They would end up with almost a whole cloth quilt with the diamonds - Just another thought.
Thanks again for hosting this!!!
Great pattern that makes a great looking quilt!
Thank you for taking this on. Can't wait to participate!
A very fun design! Thanks for sharing.
Wonderful pattern for scraps...so excited for another year of H2H!
So glad that you are hosting H2H this year. I have been joining-in since 2016, and will again this year. Thank you for all of the pattern ideas also. Posting the button to my blog sidebar.
Post a Comment